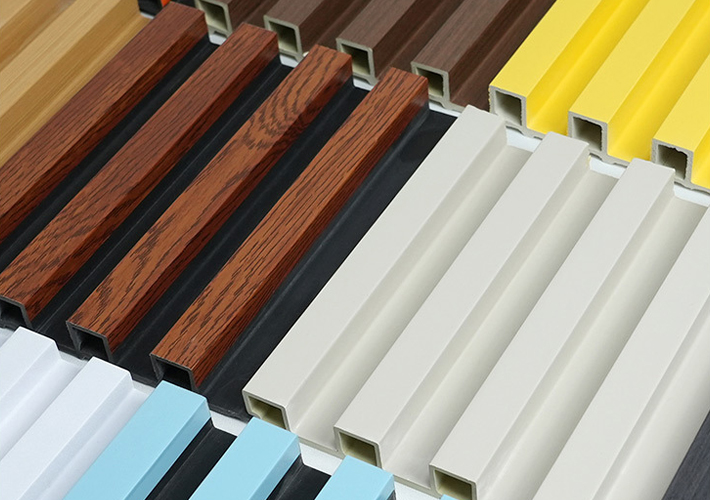
WPC wall panels are a popular choice for interior and exterior wall cladding due to their durability, aesthetics, and ease of maintenance. Their installation is straightforward, but like any other material, proper installation is essential to ensure longevity and optimal performance. This article will guide you through the process of installing WPC wall panels, offering a step-by-step breakdown, necessary tools, common installation techniques, and tips to avoid common mistakes.
1.What Are WPC Wall Panels?
Composition and Features: WPC panels are made from a blend of wood fibers and plastic, offering a balance between the natural appearance of wood and the durability of plastic. This composite material is resistant to moisture, mold, and pests, making it ideal for both indoor and outdoor use.
Advantages: Water-resistant, low maintenance, eco-friendly, easy to install, long-lasting, and aesthetically versatile.
2.Preparing for Installation
Before beginning the installation process, proper preparation is critical to ensure the job is done correctly.
A. Tools and Materials Needed
WPC wall panels
Wall mounting rails or batten system
Screws or nails
Drill
Measuring tape
Level
Saw or cutting tool
Screwdriver
Caulk and sealant (if necessary)
B. Surface Preparation
The surface where the WPC wall panels will be installed must be smooth, clean, and dry.
Drywall: Ensure the drywall or substrate is free of moisture, dirt, and loose debris.
Concrete or Masonry: For concrete surfaces, make sure they are dry and free from dust or grease.
Wooden Surfaces: If you're installing over wood, ensure the surface is level and secure.
C. Planning the Layout
Measure the Wall Area: Begin by measuring the area where the WPC panels will be installed, accounting for any windows, doors, or other obstructions.
Panel Orientation: Decide whether you want to install the panels vertically or horizontally. Horizontal installations often offer a more modern, spacious look, while vertical installations can provide a sense of height.
3.Installing WPC Wall Panels
A. Installing the Battens or Mounting Rails
The battens (wooden or metal slats) are the base structure to which the WPC panels are fastened. This ensures a secure and straight installation.
Fixing Battens to the Wall: Start by placing horizontal or vertical battens on the wall. They should be spaced approximately 12-16 inches apart, depending on the size and type of the WPC panels.
Leveling the Battens: Ensure the battens are level by using a spirit level before fixing them in place with screws or nails.
B. Cutting the WPC Panels to Size
Measure the length and width of the panels required for your installation.
Cutting Tools: You can use a saw, preferably a circular saw, or a fine-toothed saw designed for cutting composite materials.
Safety Precautions: Always wear safety goggles and a dust mask when cutting panels.
C. Installing the Panels
Start from the Bottom: Begin with the first panel at the bottom of the wall, making sure it aligns correctly with the battens.
Aligning Panels: The interlocking mechanism of the WPC panels allows them to click or snap into place. Align the grooves and tongues or clips to interlock each panel securely.
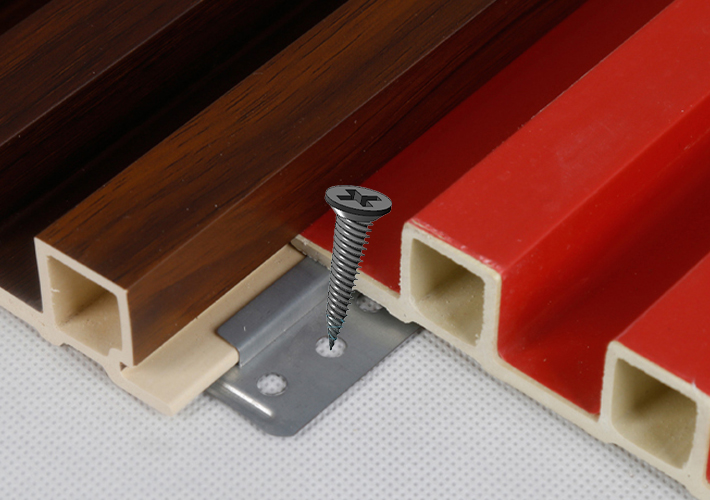
Securing Panels: Use screws or nails to fasten the panels to the battens. For a cleaner look, consider using hidden fasteners or clips designed for WPC panels.
Leveling Each Panel: Use a level to ensure each panel is straight as you work your way upward or horizontally along the wall.
D. Handling Joints and Corners
Corner Trims: For corners, use specially designed WPC corner trims or moldings. These trims are often available in matching colors and provide a smooth transition between panels.
Expansion Gaps: Always leave a small gap (approximately 1/8 inch) between the panels and any adjacent surfaces (such as the ceiling or floor) to allow for expansion and contraction due to temperature changes.
E. Cutting Panels for Fitting
Windows and Doors: If you encounter windows or door openings, measure the space carefully and cut the panels to fit around them.
Special Cuts: For odd shapes or custom installations, you may need to use a jigsaw or a fine saw for intricate cuts.
4.Finishing the Installation
Once the panels are securely attached to the wall, it’s time to finish the installation.
A. Sealing the Joints
Caulk or Sealant: To prevent moisture from getting into the joints, apply a thin layer of caulk or silicone sealant around the edges of the panels, especially in high-moisture areas like bathrooms or kitchens.
Trim and Molding: Install trim or molding along the edges of the panels for a clean, polished look.
B. Final Touches
Cleaning the Panels: Wipe down the WPC panels with a soft cloth to remove any dust or debris from the installation process.
Touch Up: If there are any visible screw heads or nails, consider covering them with color-matched caps or filler.
5.Tips for Successful WPC Wall Panel Installation
Ensure Proper Ventilation: WPC panels are breathable, but it's important to ensure proper air circulation behind the panels, especially for external installations, to prevent moisture buildup.
Follow Manufacturer’s Instructions: Always refer to the manufacturer’s installation guidelines, as different WPC panels may have specific requirements.
Check Alignment Regularly: Consistently check the alignment of each panel to avoid crooked installations.
Use Quality Fasteners: Ensure that the screws, nails, or clips used are rust-resistant and appropriate for the type of surface you're installing on.
6.Common Installation Mistakes to Avoid
Not Preparing the Surface Properly: A well-prepared surface ensures a smooth installation. Failing to clean or level the surface can lead to uneven panel alignment.
Incorrect Panel Spacing: Not leaving expansion gaps can cause the panels to warp or bow over time.
Over-tightening Fasteners: Over-tightening screws can cause the panels to crack or bow. Ensure fasteners are secure but not overly tight.
7.Maintenance of WPC Wall Panels
After installation, WPC wall panels require minimal maintenance, but periodic care is still essential:
Regular Cleaning: Clean the panels with a soft cloth and a mild detergent to maintain their appearance.
Inspect for Damage: Check for any signs of wear, especially at the seams or joints. Re-seal any gaps if necessary.
Protect from Direct UV Exposure: While WPC panels are resistant to fading, excessive UV exposure can reduce their lifespan. Consider installing UV-resistant finishes if necessary.
Conclusion
Installing WPC wall panels is a relatively simple process that can be done by DIY enthusiasts or professionals. By following the steps outlined in this guide, you can ensure a clean, professional-looking installation that will last for years. Proper preparation, correct tools, and attention to detail during the installation process are key factors to achieving optimal results. Whether you're updating the interior of your home or enhancing the exterior, WPC panels provide a durable, low-maintenance solution with a modern, stylish appearance.